NOTE: For people using Blender, please click this link to go to a similar tutorial on exporting ASE models from Blender by tonnedu: http://www.box.net/shared/9zis1qnr1u
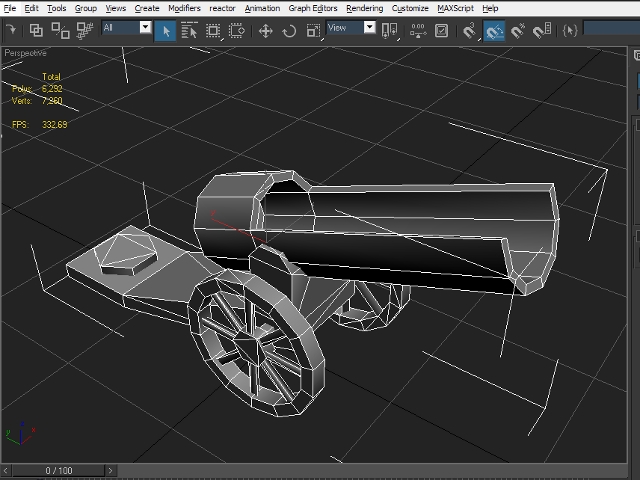
1. Create your model.
Make sure it's optimized. Weld all redundant vertices, make sure there are no inverted normals, apply smooth groups, and DON'T for the sake of goobers make a model with a gajillion polies. Remember this is for a game not a movie.
In this tutorial I made a cannon/jumppad model that will also be used in a map I am currently making.
2. Unwrap and texture your model.
I deliberately used a model which uses several materials in it. Note that you do not need to assign a Multi/SubObject Material on the model. Just apply individual materials to whatever faces you want to your heart's content.
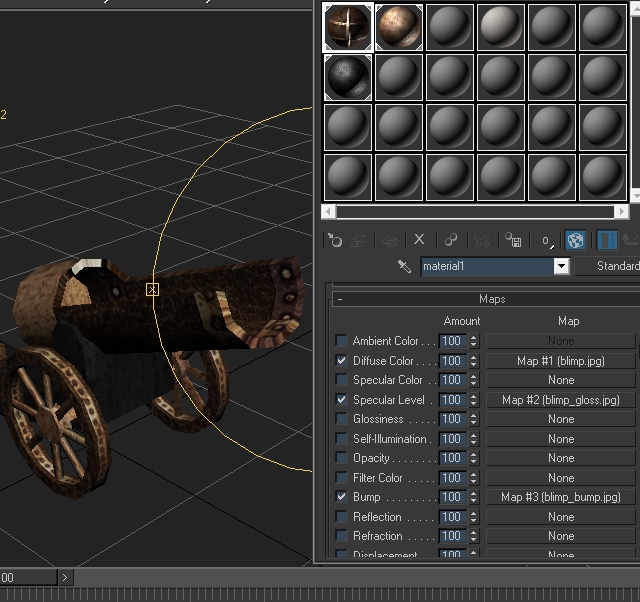
Make sure all your materials are named correctly. Even if the ASE export specifies bump maps, specularity maps etc. NetRadiant ignores those and focuses solely on the diffuse texture. The engine will automatically read secondary textures by itself based on similarity of the filename and the suffix appended. A good thing about this is that you can edit the textures used later on, and even add more, like bump maps or self-illumination maps in case you forgot to add it inside 3dsmax itself.
From the wiki:
* texturename.tga - diffuse texture
* texturename_norm.tga - normal map. Nexuiz uses tangent space normal map with inverted Y channel (OpenGL style) you can put height map in normal maps alpha channel and it will be used when offset or relief mapping is on
* texturename_bump.tga - bump map. Normal map have higher priority and it will overwrite bump map. It's wise to convert your bump map to normal map, because that way you can have higher roughness since height of each bump map is limited by cvar
* texturename_gloss.tga - specular, shininess strength. It can use colour (note from me: basically it's a combination of 3dsmax's specularity level and specularity color maps)
* texturename_glow.tga - fullbright map or self-illumination map or Incandesence map or how else its called
The following are for character models:
* texturename_pants.tga - primary colour. This one tells what part of texture will use custom colour. Make it grayscale and leave same area 100% black in diffuse texture
* texturename_shirt.tga - secondary color
Note that while the example filenames use a .tga format, I highly recommend using .jpg's instead to keep your pk3 files smaller. Also, the bump maps will not show up on default test compiles (from tZork), they'll only become visible ingame once you do a -deluxe light compile which is part of all the default final builds in radiant.
Details can be found here:
http://dev.alientrap.org/wiki/1/Textures
3. Place all the textures you used (or a copy of them) inside Nexuiz/data/textures/yourmapname/. Where you originally referenced them from inside 3dsmax is not important. Note that it's a good practice to make different folders with the name of your map inside the textures directory rather than just place them directly within Nexuiz/data/textures/.
The map I will be using this model for is named corsair, so I placed my textures inside Nexuiz/data/textures/corsair/
Note that if the folder does not exist in your nexuiz install, create it.
4. Rename the Material and enable DirectX display of materials. The following is the most important step if you want your models to have textures both ingame and in-editor.
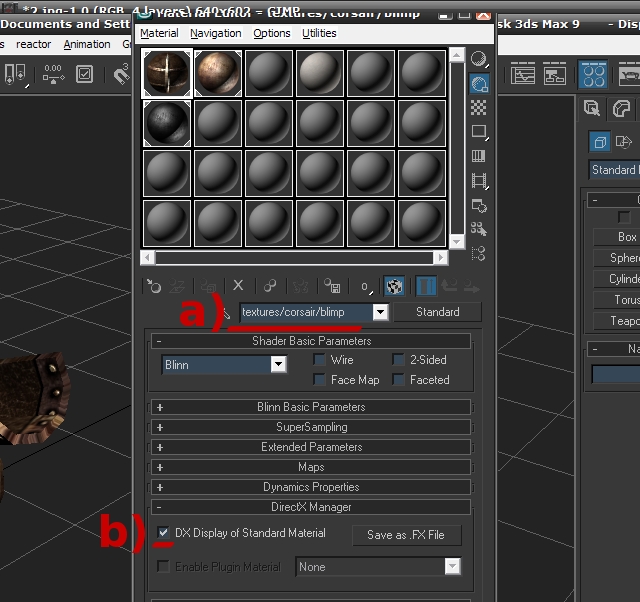
a) change the Material NAME (not the paths of the maps themselves) to point to the name of your texture inside the nexuiz data folder.
format should be: textures/yourmapname/nameoftexture
File extensions are not necessary. And you only need to point to the name of your diffuse texture. The other maps (_gloss, _bump, etc.) if present will be read automatically by the engine. Do this for all of the materials you used. (In this example I used three, so I named them textures/corsair/blimp, textures/corsair/metalblack, and textures/corsair/rust respectively).
b) Check the DX display of standard material under the DirectX manager rollout. Neglecting to do this will mean your models will say 'no shader found' in-editor but will show the correct textures ingame. And believe me, working on a map when you can't see the textures is hellish.
5. Export the model as ASE (file>export selected) with the following settings.
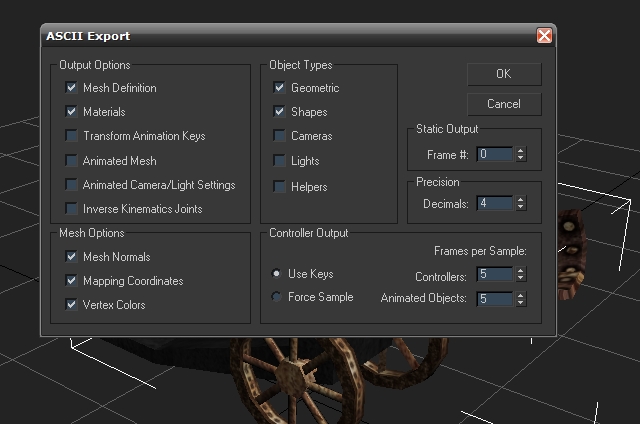
If you had animations or whatnot you can change the export settings, but I personally don't know what the correct settings are for importing animated ASE models into radiant.
6. Place the newly created ASE model into Nexuiz/data/models/yourmapname/
Again if a models/ folder does not exist in your Nexuiz install, create it.
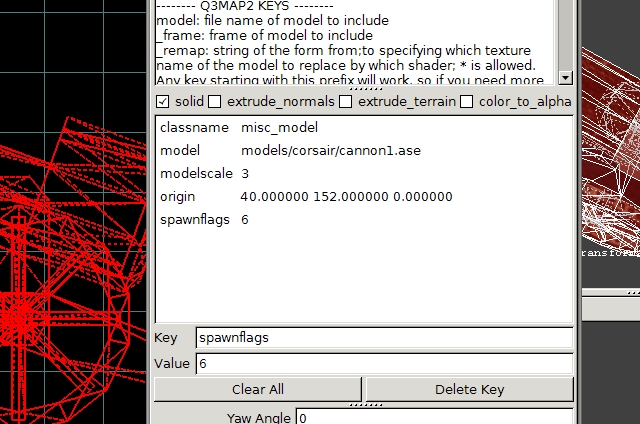
7. Open your map (or your soon to be map) in NetRadiant/GTKRadiant. Right click on the window with the grids and select misc>misc_model then navigate to where you placed your ASE model inside the Nexuiz/data/models/yourmapname/ folder, change the dropdown selection to show .ASE files, select the ASE file and click open.
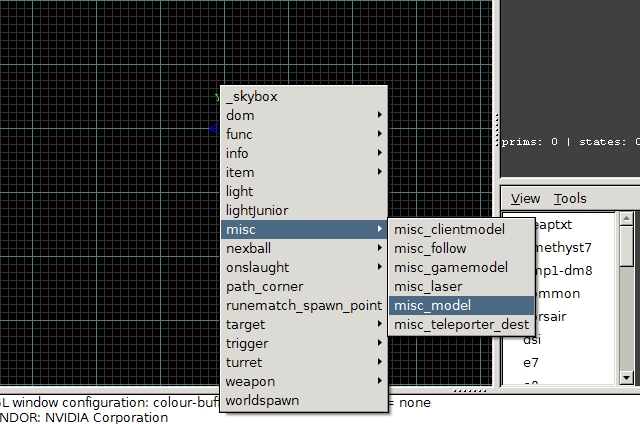
8. That's it. If you did all the previous steps correctly you should now see your model inside radiant.
Helpful tips:
- use the modelscale key in the entity viewer to scale your models correctly.
- use spawnflags 6 to make your model act like it's a brush (i.e. lighted, solid, etc.)
- AFAIK ASE models can NOT be flipped (although they can be rotated). Which sucks. T_T Also I've encountered a lot of problems in which radiant seems to assign the ASE models with new pivots (or as it calls them 'origins') which makes it very unpredictable for rotation and scaling of the models.